Member Builds by Stormfox
ASHWING
Tank/Damage Magicka Dragonknight for No-CP PVP in Light Armor
06.07.2017 - First date created
25.12.2017 - Last update
06.07.2017 - First date created
25.12.2017 - Last update
Summary:
The Ashwing build is a powerful Magicka Dragonknight build for no-champion points player-vs-player gameplay. On this build, we run the Mundus stone: The Apprentice (or The Atronach if you struggle with sustain) for more Spell Damage. It is recommended to use purple tri-stat food to have enough Magicka and Stamina. Immovability potions will greatly increase your survivability. The Ashwing build is a real brawler build which is hard to master, yet very rewarding if mastered.
The Ashwing build is a powerful Magicka Dragonknight build for no-champion points player-vs-player gameplay. On this build, we run the Mundus stone: The Apprentice (or The Atronach if you struggle with sustain) for more Spell Damage. It is recommended to use purple tri-stat food to have enough Magicka and Stamina. Immovability potions will greatly increase your survivability. The Ashwing build is a real brawler build which is hard to master, yet very rewarding if mastered.
Difficulty
Hard - Due to the fact we use five pieces of Light Armor in this build, this build requires a lot of discipline. It is crucial to keep your buffs up and to keep pressuring your enemy. One mistake can mean your sudden death. Therefore, this build has a high learning curve.
Hard - Due to the fact we use five pieces of Light Armor in this build, this build requires a lot of discipline. It is crucial to keep your buffs up and to keep pressuring your enemy. One mistake can mean your sudden death. Therefore, this build has a high learning curve.
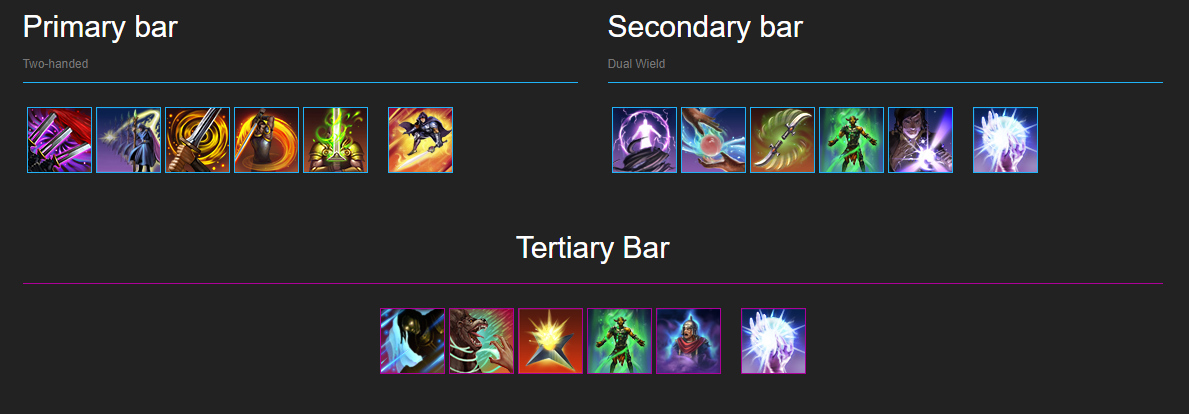
Skills
Solo setup:

Group setup:

Gear
Best in slot:
| Slot | Weight | Set | Trait | Glyph |
|---|---|---|---|---|
| Head | Heavy | Valkyn Skoria | Impenetrable | Max Magicka |
| Shoulders | Medium | Valkyn Skoria | Impenetrable | Max Magicka |
| Chest | Light | Fortified Brass | Impenetrable | Max Magicka |
| Legs | Light | Fortified Brass | Impenetrable | Max Magicka |
| Gloves | Light | Scathing Mage | Impenetrable | Max Magicka |
| Boots | Light | Fortified Brass | Impenetrable | Max Magicka |
| Belt | Light | Fortified Brass | Impenetrable | Max Magicka |
| Weapon One | Sword / Axe / Mace | Scathing Mage | Sharpened | Absorb Magicka |
| Weapon One (off-hand) | Shield | Fortified Brass | Infused | Max Stamina |
| Weapon Two | Frost Destruction Staff | Fortified Brass | Precise | Flame |
| Necklace | Scathing Mage | Arcane | Reduce Spell Cost | |
| Ring | Scathing Mage | Arcane | Magicka Recovery | |
| Ring | Scathing Mage | Arcane | Magicka Recovery |
Alternative(s):
Swap Scathing Mage for Burning Spellweave, which drops in City of Ash.
Swap Fortified Brass for Impregnable Armor in all Sturdy or Divines, which drops in Battlegrounds.
Swap Scathing Mage for Burning Spellweave, which drops in City of Ash.
Swap Fortified Brass for Impregnable Armor in all Sturdy or Divines, which drops in Battlegrounds.
Race
Breton - The first choice for this build is the Breton race. Due to the high cost of abilities, the Magicka cost reduction passive 'Magicka Mastery' is very benificial. Also the Breton gains a 10% gain in Maximum Magicka from the 'Gift of Magnus' passive. A nice addition is the 'Opportunist' passive increasing your Alliance Points earned by 1%, which on the long run can make a big difference.
Dunmer - The second race recommended is the Dunmer (Dark Elf). This race gains 6% Maximum Magicka and Maximum Stamina from the 'Dynamic' passive. In addition this race gains another 3% in Maximum Magicka from the 'Resist Flame' passive. Lastly this race is a great option due to its' 'Destructive Ancestry' passive: increasing Flame Damage by 7%.
Altmer - The Altmer is the third choice for this build. The 'Spellcharge' passive gives a solid 9% increase in Magicka Recovery. This race also gains 10% Maximum Magicka from 'The Gift of Magnus' passive. Lastly this race deals 4% more Flame Damage from the 'Elemental Talent' passive.
Playstyle
Pre-fight:
Before entering a fight, you should always buff your character. Volatile Armor, Degeneration and Unrelenting Grip are your main buffs. Volatile Armor sets your resistance levels at a healthy value. Degeneration increases your Spell Damage and acts as an off-heal. Unrelenting Grip gives you access to Major Expedition and also acts as a gap closer. If you are dealing with a ranged enemy, you should also activate Dragon Fire Scale to reflect incoming projectiles.
In-fight:
Your first move is activating Flames of Oblivion. This ability launches a flaming projectile at your enemy every 5 seconds. Next, you apply Burning Embers to put pressure on your enemy. Burning Embers also heals you after the duration of the effect. You can reapply this ability to get healed instantly. However, the longer the effect is active, the larger the heal will be. Now for the burst combination: First use Deep Breath. Follow it up with Fossilize, stunning and rooting your enemy. After this, use the Flame Lash ability to deal great damage. The Power Lash will also activate due to your enemy being off-balance. To increase your burst damage, you can follow this up with the Ferocious Leap ultimate ability. Make sure your buffs (Volatile Armor, Degeneration and Unrelenting Grip) are active at all times. Re-apply Burning Embers when the duration ends or if you need a heal. When you are really low on Health, you can use Coagulating Blood as a burst heal. Another crucial part of this build is blocking. Due to relative low resistance values, it is important to block burst damage such as: Dawnbreaker, Take Flight, etc. However, blocking too much will leave you funerable to CC. Hence we run a Frost Destruction Staff on the back bar, which allows us to block using Magicka instead of Stamina.
Group play:
If you run in a group, you can use the group setup. In which we swap our single target stun (Fossilize) for Burning Talons to root multiple enemies. We combine this with Elemental Blockade which snares enemies and roots chilled (status effect) enemies. We also use Proximity Detonation to increase our burst on enemy raids and zergs. The combination of Deep Breath, Proximity Detonation and Ferocious Leap is an extremely powerful and unexpected suprise for most groups. Good timing however is essential:
Activate Proximity Detonation (0.5s); count to two (2.5s); activate Deep Breath (3s); count to two (5.5s); activate Ferocious Leap (6s).
Nightsky
Damage Magicka Nightblade for No-CP PVP in Heavy Armor
23.07.2017 - First date created
23.02.2018 - Last update
23.07.2017 - First date created
23.02.2018 - Last update
Summary:
The Nightsky build is a powerful Magicka Nightblade build for no-champion points player-vs-player gameplay. On this build, we run the Mundus stone: The Apprentice (or The Atronach if you struggle with sustain) for more Spell Damage. It is recommended to use purple tri-stat food to have enough Magicka and Stamina. Immovability potions will greatly increase your survivability. The Nightblade build is a tanky and high burst build which will need some practice to be effective.
The Nightsky build is a powerful Magicka Nightblade build for no-champion points player-vs-player gameplay. On this build, we run the Mundus stone: The Apprentice (or The Atronach if you struggle with sustain) for more Spell Damage. It is recommended to use purple tri-stat food to have enough Magicka and Stamina. Immovability potions will greatly increase your survivability. The Nightblade build is a tanky and high burst build which will need some practice to be effective.
Difficulty
Medium - This Magicka Nightblade build does not include cloak and includes 5 heavy armor pieces. Long sustained fights are also possible with this build. 1vX'ing is not recommended starting from 1v3 combat. Survivability is mediocre and relies heavily on healing over time (hots).
Medium - This Magicka Nightblade build does not include cloak and includes 5 heavy armor pieces. Long sustained fights are also possible with this build. 1vX'ing is not recommended starting from 1v3 combat. Survivability is mediocre and relies heavily on healing over time (hots).
Skills
Coming soon!
Solo setup:

Group setup:

Gear
Best in slot:
| Slot | Weight | Set | Trait | Glyph |
|---|---|---|---|---|
| Head | Heavy | Valkyn Skoria | Sturdy | Max Magicka |
| Shoulders | Light | Valkyn Skoria | Impenetrable | Max Magicka |
| Chest | Heavy | Impregnable Armor | Sturdy | Max Magicka |
| Legs | Heavy | Impregnable Armor | Sturdy | Max Magicka |
| Gloves | Light | Spinner's Garnent | Impenetrable | Max Magicka |
| Boots | Heavy | Impregnable Armor | Sturdy | Max Magicka |
| Belt | Heavy | Impregnable Armor | Sturdy | Max Magicka |
| Weapon One | Inferno Destruction Staff | Spinner's Garnent | Infused | Increase Weapon/Spell Damage |
| Weapon Two | Restoration Staff | Spinner's Garnent | Infused | Crushing |
| Necklace | Impregnable Armor | Arcane | Magicka Recovery | |
| Ring | Spinner's Garnent | Arcane | Magicka Recovery | |
| Ring | Spinner's Garnent | Arcane | Magicka Recovery |
Alternative(s):
Swap Spinner's Garnent for Flame Blossom set to get a Spell Penetration bonus, which drops in Bloodroot Forge.
Swap Impregnable Armor for Fortified Brass in all Impenetrable, which can be crafted in the Clockwork City.
Swap Spinner's Garnent for Flame Blossom set to get a Spell Penetration bonus, which drops in Bloodroot Forge.
Swap Impregnable Armor for Fortified Brass in all Impenetrable, which can be crafted in the Clockwork City.
Race
Dunmer - The second race recommended is the Dunmer (Dark Elf). This race gains 6% Maximum Magicka and Maximum Stamina from the 'Dynamic' passive. In addition this race gains another 3% in Maximum Magicka from the 'Resist Flame' passive. Lastly this race is a great option due to its' 'Destructive Ancestry' passive: increasing Flame Damage by 7%.
Altmer - The Altmer is the first choice for this build. The 'Spellcharge' passive gives a solid 9% increase in Magicka Recovery. This race also gains 10% Maximum Magicka from 'The Gift of Magnus' passive. Lastly this race deals 4% more Flame Damage from the 'Elemental Talent' passive.
Breton - The third choice for this build is the Breton race. Due to the high cost of abilities, the Magicka cost reduction passive 'Magicka Mastery' is very benificial. Also the Breton gains a 10% gain in Maximum Magicka from the 'Gift of Magnus' passive. A nice addition is the 'Opportunist' passive increasing your Alliance Points earned by 1%, which on the long run can make a big difference.
Playstyle
Pre-fight:
Coming soon!
In-fight:
Coming soon!
Group play:
Coming soon!
Coming soon!
In-fight:
Coming soon!
Group play:
Coming soon!
Typhoon
Damage Stamina Sorcerer for No-CP PVP in Medium Armor
03.01.2018 - First date created
03.01.2018 - First date created
Summary:
The Typhoon build is a robust Stamina Sorcerer build for no-champion points player-vs-player gameplay. On this build, we run the Mundus stone: The Warrior (or The Serpent if you struggle with sustain) for more Weapon Damage. It is recommended to use purple tri-stat food to have enough Magicka and Stamina. Immovability potions will greatly increase your survivability. The Typhoon build is ideal for fighting against the ods and not hard to master.
The Typhoon build is a robust Stamina Sorcerer build for no-champion points player-vs-player gameplay. On this build, we run the Mundus stone: The Warrior (or The Serpent if you struggle with sustain) for more Weapon Damage. It is recommended to use purple tri-stat food to have enough Magicka and Stamina. Immovability potions will greatly increase your survivability. The Typhoon build is ideal for fighting against the ods and not hard to master.
Difficulty
Moderate - This build is in the easy end of moderate. The damage of this build has a lot of burst combined with good area of effect damage. The heals of this build are amazing due to the sources for healing: Critical Surge, Rally and Vigor. The reason this build is of moderate difficulty is because this build lacks good resistance levels and the main source of damage is Dizzying Swing, which is a channeled ability. Leaving you vunerable for interrupts and damage.
Moderate - This build is in the easy end of moderate. The damage of this build has a lot of burst combined with good area of effect damage. The heals of this build are amazing due to the sources for healing: Critical Surge, Rally and Vigor. The reason this build is of moderate difficulty is because this build lacks good resistance levels and the main source of damage is Dizzying Swing, which is a channeled ability. Leaving you vunerable for interrupts and damage.
Skills
Solo setup:
Group setup:

Gear
Best in slot:
| Slot | Weight | Set | Trait | Glyph |
|---|---|---|---|---|
| Head | Light | Molag Kena | Impenetrable | Max Stamina |
| Shoulders | Medium | Kra'gh | Impenetrable | Max Stamina |
| Chest | Heavy | Hunding's Rage | Impenetrable | Max Stamina |
| Legs | Medium | Hunding's Rage | Impenetrable | Max Stamina |
| Gloves | Medium | Hunding's Rage | Impenetrable | Max Stamina |
| Boots | Medium | Hunding's Rage | Impenetrable | Max Stamina |
| Belt | Medium | Hunding's Rage | Impenetrable | Max Stamina |
| Weapon One | Two-handed Axe | Agility | Infused | Increase Weapon Damage |
| Weapon Two | One-handed Axe | Endurance | Infused | Increase Weapon Damage |
| Weapon Two (off-hand) | One-handed Axe | Endurance | Precise | Shock Damage |
| Necklace | Agility | Robust | Reduce Feat Cost | |
| Ring | Agility | Robust | Stamina Recovery | |
| Ring | Endurance | Robust | Stamina Recovery |
Alternative(s):
Swap your axes for swords to increase your flat damage output, sacrificying bleed damage.
Swap Hunding's Rage for Spriggan's Thorns, which drops in Bangkorai (zone).
Swap Hunding's Rage for Twice-Fanged Serpent, which drops in Sanctum Ophidia.
Swap your axes for swords to increase your flat damage output, sacrificying bleed damage.
Swap Hunding's Rage for Spriggan's Thorns, which drops in Bangkorai (zone).
Swap Hunding's Rage for Twice-Fanged Serpent, which drops in Sanctum Ophidia.
Race
Khajiit - The first choice for this build is the Khajiit race. The Carnage passive gives us 8% more Weapon Critical which benefits the Critical Surge ability. The Nimble passive ability gives us a 10% increase in Stamina Recovery.
Orsimer - The second race recommended is the Orsimer (Orc). This has more Maximum Stamina (+6%) due to the Brawny passive. The Swift Warrior passive gives us a 4% increase in all Melee Damage and reduces Sprint cost by 12% and increases Sprint speed by 10%. Which gives us more raw damage and mobility.
Redguard - The Redquard is the third choice for this build. This race gives us more Maximum Stamina (+10%) from the Conditioning passive. Besides giving us more sustain from the Exhilaration passive, which increases our Stamina Recovery by 10%. Last, this race offers even more sustain when dealing Melee Damage. The Adrenaline Rush passive restores 792 Stamina and can occur once every 5 seconds.
Bosmer - The fourth option for this build is the Bosmer (Wood Elf). Which has an increased Stamina Recovery of 21% from the Y'ffre's Endurance passive. On top of that, the Resist Affliction passive gives us 6% more Maximum Stamina.
Playstyle
Pre-fight:
Buff your character with Hurricane, Rally and Critical Surge. It is adviced to also activate Resolving Vigor and placing down Razor Caltrops before entering the fight. To enter the fight you can use Critical Rush. With the solo setup you also can place down the Rearming Trap and activate Shuffle for the Minor Force and Major Evasion buffs. Additionally you can use Defensive Rune against ranged players which are too far away for any gap closer.
In-fight:
Your first move agains solo players is Critical Rushing them. Getting up close and personal is most fun and challenging. Alternatively you can use Streak to close the gap, which also funtions as a Stun against groups. Follow this up with a light attack and do a Dizzying Swing. Whilst the Dizzying Swing is channeling, you can hold down your left mouse button to charge a heavy or medium attack. This is important for both damage output and sustain. Each successful fully-charged Heavy Attacks increase the damage of your next attack by 5% for 7 seconds and restores Stamina. Additionally weaving light, medium and heavy attacks will restore Ultimate points. Our Ultimate Dawnbreaker works both good vs solo players and groups.
Group play:
If you run in a group, you can use the group setup which does not feature the Overload bar and Dark Deal ability. Instead we have Razor Caltrops on the back bar and use Suppresion Field (a.k.a. Negate) as our Ultimate ability. Which silences all enemy players within the globe of magic. In the ideal situation you first use Razor Caltrops to snare them. Then place the Suppresion Field on top of that and locking them in place with our Streak ability, stunning all players on our path. You will deal most of your damage to them using Steel Tornado, which also is a finisher: Dealing up to 100% more damage to enemies based on each percentage of their missing Health. It is important to call out the 'negate' and 'streak' to your group mates, allowing them to use their Ultimates when the enemy is most vunerable. Timing is therefore essential.
